The Fulcrum Effect: How Wheel Offset and Unsprung Mass Dictate Bearing Life

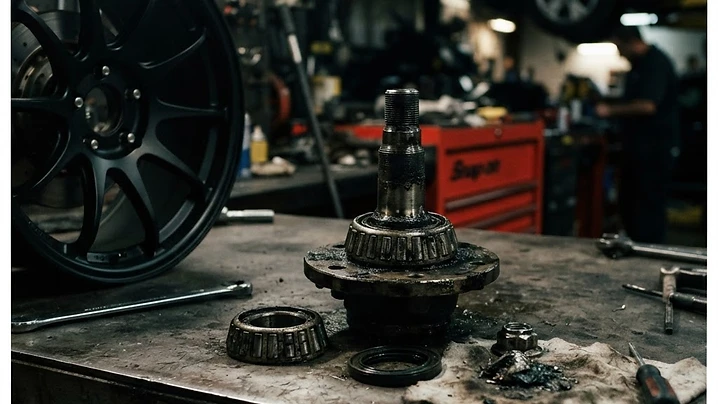
Pushing your wheels outward or bolting on heavy rolling assemblies changes the physics of your hubs. Here is how offset, scrub radius, and leverage destroy wheel bearings—and how to diagnose failing units before failure.
Every time a customer walks into the shop asking for aggressive stance, flush fitments, or deep-dish offsets, they focus on clearance: will it rub the fender liner, and will it clear the brake caliper? Almost nobody asks about the wheel hub. Yet, buried directly behind the rotor hat sits the hardest-working mechanical interface in your chassis: the wheel bearing assembly.
Your wheel bearings carry the entire corner weight of your vehicle—often 800 to 1,500 lbs per corner on modern crossovers, EVs, and half-ton trucks—while spinning thousands of times per minute under intense thermal and kinetic load. When you alter wheel offset or add heavy rotating mass, you fundamentally alter the mechanical leverage applied to those hardened steel balls and races.
The Physics of Offset: Turning Your Hub Into a Lever
Factory suspension engineers design hub assemblies around a specific wheel centerline. When an OEM specifies an offset (say, +45mm), the calculated dynamic load line falls directly between the inboard and outboard bearing raceways. This equalizes radial pressure across both rows of rolling elements.
When you install aggressive aftermarket wheels (dropping offset to +15mm) or throw on a set of 25mm hub-centric spacers, you move the wheel's contact patch outward. This creates what engineers call a moment arm (or cantilever effect):
- The Fulcrum Shift: The hub face becomes a fulcrum. Instead of pure radial load pushing straight up through the bearing center, the outward-shifted wheel acts like a pry bar.
- Asymmetrical Wear: The outboard bearing row experiences massive tensile tension, while the inboard row takes concentrated compression.
- Scrub Radius Alterations: Pushing the centerline outboard shifts your scrub radius positive. During cornering or heavy braking, directional forces apply extra torsional twist directly through the hub spindle.
According to bearing life equations based on ISO 281 and SAE engineering standards, bearing service life (L10 rating) is inversely proportional to the cube of the dynamic equivalent load ($L_{10} = (C/P)^3$ for ball bearings). A rule of thumb every tech uses: increasing total dynamic leverage on a hub assembly by just 25% can cut bearing fatigue life by more than half.
Factory Setup:     [Bearing Inboard] <--- Load Center ---> [Bearing Outboard]
Aggressive Stance: [Bearing Inboard] ---------------------> [Bearing Outboard] =====[Leverage / Load]
Bearing Load and Failure Benchmarks
| Specification / Parameter | Factory Spec Benchmark | Aggressive Offset / Heavy Assembly | Impact on Component | | :--- | :--- | :--- | :--- | | Wheel Offset | +40mm to +50mm | +10mm to +20mm (or 25mm+ spacers) | Introduces cantilevered moment arm | | Unsprung Mass (Wheel+Tire) | ~45–55 lbs (sedan/CUV) | ~65–85 lbs (oversized wheels/E-load tires) | Amplifies vertical pothole impact shock | | Expected Bearing Lifespan | 85,000 to 100,000 miles | Under 40,000 miles in severe offsets | Premature race pitting and spalling | | Hub Runout Tolerance | < 0.002 inches (lateral) | Exceeds 0.005 inches over time | Causes rotor knockback & pedal pulsation | | Replacement Cost (per hub) | $250 – $600 (parts + labor) | Repeated premature replacements | Compounded repair costs |
Reading the Symptoms: How to Diagnose Bearing Noise Like a Tech
Wheel bearing failure is often misdiagnosed as tire scalloping, cupping, or brake drag. Recognizing the distinct acoustic and physical signatures will save you from replacing the wrong parts.
1. The Low-Pitch Growl and the Load Transfer Test
A bad wheel bearing typically presents as a deep drone or growl—similar to running aggressive mud-terrain tires on dry pavement—starting around 35 to 45 mph. Unlike cupped tires (which remain noisy regardless of turning angle), wheel bearing noise changes with lateral load transfer:
- If you sway the car gently side-to-side on a safe, open stretch of road, note when the growl gets louder.
- The Rule of Load: Swerving right transfers chassis weight to the left wheels. If the drone intensifies when sweeping right, your left bearing is overloaded and damaged. If sweeping left makes the noise louder, check the right bearing.
2. Brake Pad Knockback and Long Pedal Travel
As bearing internal clearances loosen from spalled races, the hub face develops excessive lateral runout. As you drive, that slight wheel wobble pushes the brake rotor against the brake pads, spreading the caliper pistons outward. The result? A spongy, deep brake pedal on initial press, followed by normal firmness on the second pump.
3. The 12-and-6 Physical Check
Lift the vehicle safely on jack stands. Grab the mounted tire firmly at the 12 o’clock and 6 o’clock positions and rock it back and forth:
- If you feel physical clunk or play, your bearing has lost internal preload.
- Tech Tip: Checking at 9 and 3 o'clock tests tie-rod ends and steering rack slack; checking strictly at 12 and 6 isolates the hub assembly and ball joints.
Who Is Most at Risk?
In our repair bays, we see premature bearing failure clustered in three distinct segments:
- Lifted Half-Ton Trucks & SUVs: Drivers running high-negative-offset wheels (-12mm to -44mm) paired with heavy 10-ply (Load Range E) tires that add 30+ lbs of unsprung weight per corner.
- EV Drivers (Tesla Model 3/Y, Mustang Mach-E): Heavy vehicle curb weights combined with silent electric drivetrains make slight bearing noise noticeable early, while the high instantaneous torque puts immense shear stress through hub splines.
- Rust Belt Commuters: Drivers in the Northeast and Midwest face winter de-icing brine (calcium chloride), which penetrates aging hub grease seals, accelerating micro-pitting long before mechanical fatigue sets in.
What to Do Next
- Audit Your Wheel Offset: If upgrading wheels, try to stay within $\pm$5mm to 10mm of your vehicle manufacturer's factory scrub radius and offset specs to avoid unnecessary cantilevered loads.
- Perform the Coasting Swerve Test: At the first hint of an audible low-speed hum, perform gentle lateral lane transitions in a safe area to determine if the pitch fluctuates with side-to-side weight transfer.
- Inspect for Seal Leakage During Rotations: Whenever your wheels are off for routine 5,000-to-7,500-mile tire rotations, inspect the back of the hub knuckle for wet grease slinging past the dust seal.
- Verify Torque Specs with a Calibrated Wrench: Never allow a shop to install axle nut spindle bolts with an impact gun. Hub unit bearings rely on precise axle nut torque (typically 150–250 lb-ft depending on OEM spec) to clamp the internal bearing halves together; improper torque will ruin a new bearing within 500 miles.