The Flush Fitment Blueprint: How to Calculate Poke and Tuck Before You Buy

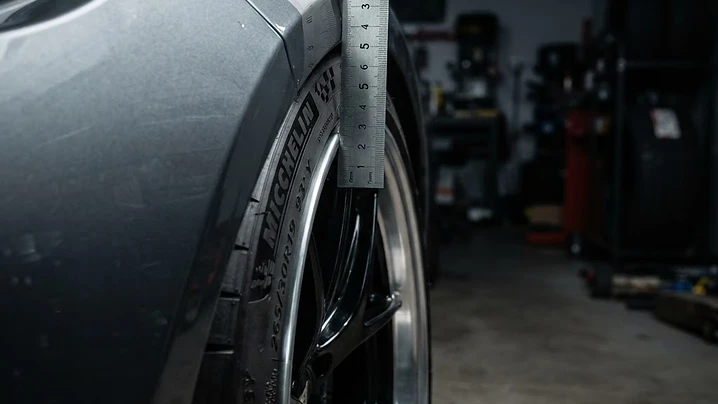
Stop guessing how your new wheels will sit against the fender. Learn how to calculate poke and tuck to achieve a perfect flush fitment without rubbing.
Achieving the Perfect Stance
For most enthusiasts, the goal of upgrading wheels isn't just a new design; it’s achieving "flush" fitment—where the outer face of the wheel aligns perfectly with the edge of the fender. Get the math wrong, and you end up with "sunken" wheels that look weak or "poke" that causes tires to shred against the metal.
Before you hit 'buy' on a set of aftermarket rims, you need to calculate exactly how much further out the new setup will sit compared to your current one.
Step 1: Establish Your Baseline
To know where you’re going, you must know where you are. Park on a level surface and perform the String Test:
- Tape a piece of string to the top center of your fender arch so it hangs down across the center of the wheel.
- Use a metric ruler to measure the distance from the string to the edge of your current rim (not the tire).
- This measurement is your "clearance budget." If the distance is 20mm, a wheel that sits 20mm further out will be perfectly flush.
Step 2: The Math of "More"
Fitment changes based on two variables: Width and Offset (ET). When you move to a wider wheel or a lower offset, the wheel moves toward the fender.
- Width Change: Every inch of added width splits between the inside and outside. A wheel that is 1 inch wider will poke out 12.7mm (half an inch) more than the old one, assuming the offset stays the same.
- Offset Change: Lowering the offset (e.g., going from ET45 to ET35) pushes the wheel out. In this case, it pushes the wheel out exactly 10mm.
The Formula: (Added Width / 2) + (Old Offset - New Offset) = Total New Poke
Example: If you move from an 8" ET45 wheel to a 9" ET35 wheel: (25.4mm / 2) + (45 - 35) = 12.7mm + 10mm = 22.7mm of additional poke.
Step 3: Factoring in Suspension and Camber
Calculations give you a static number, but cars are dynamic.
- Suspension Travel: If your car is lowered, the wheel travels upward and inward (camber gain) as the suspension compresses.
- Fender Rolling: If your calculation shows 25mm of poke but you only have 20mm of clearance, you will need to roll your fender lips or run increased negative camber to avoid rubbing.
- Tire Stretch: A narrower tire on a wider rim can provide extra clearance at the shoulder, but it reduces rim protection.
Pro-Tips for Online Buyers
- Measure twice, buy once: Always measure both front and rear; many cars require different offsets to look flush on both axles.
- Account for the lip: Some wheel designs have a convex face that protrudes beyond the rim edge. If you are aiming for tight tolerances, check the wheel profile.
- Test with spacers: If you aren't ready to buy new wheels yet, use cheap slip-on spacers to test different poke distances and see what your car can actually clear during full-lock turns.


